
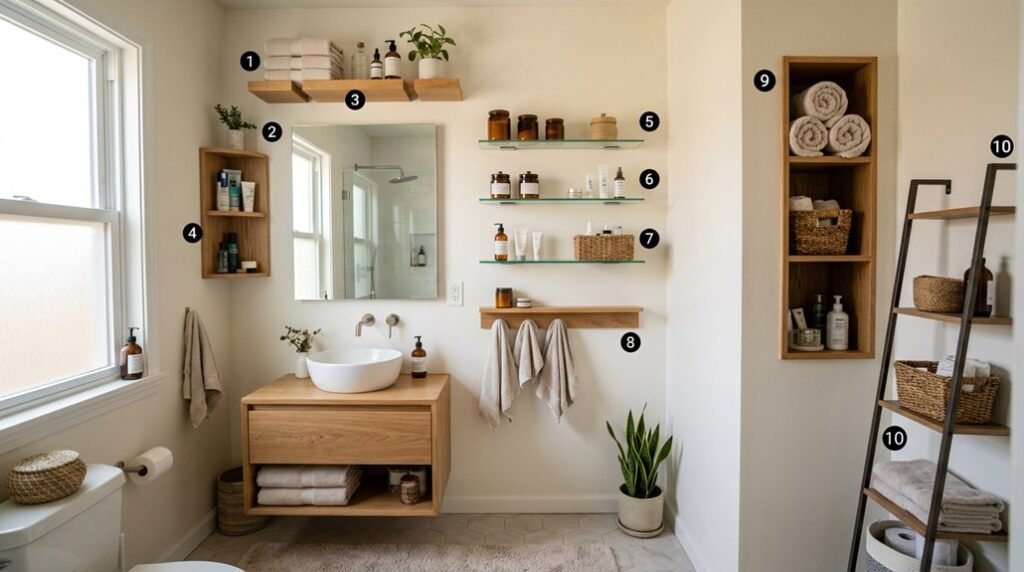
The average small bathroom measures just 40 square feet, yet you need storage for 15 to 20 daily-use items. You’re working with vertical real estate, tight clearances, and moisture exposure that warps standard materials in 6 to 12 months.
These 10 shelf configurations solve those constraints with specific dimensions, material ratings, and installation sequences you can execute in 2 to 4 hours. Each solution maximizes capacity without sacrificing the 18-inch toilet clearance code requires, or the 24-inch sink access you need for daily function.
The first option alone reclaims 12 to 18 inches of unused wall space above your tank, but only if you select the right substrate and bracket spacing. You’ll need to know which materials withstand 80 to 90% humidity cycles, and which mounting hardware supports 25 to 50 pound loads without wall damage.
The following sections break down each system with load capacities, moisture-resistance ratings, and step-by-step placement rules.
Install Floating Bathroom Shelves Above the Toilet
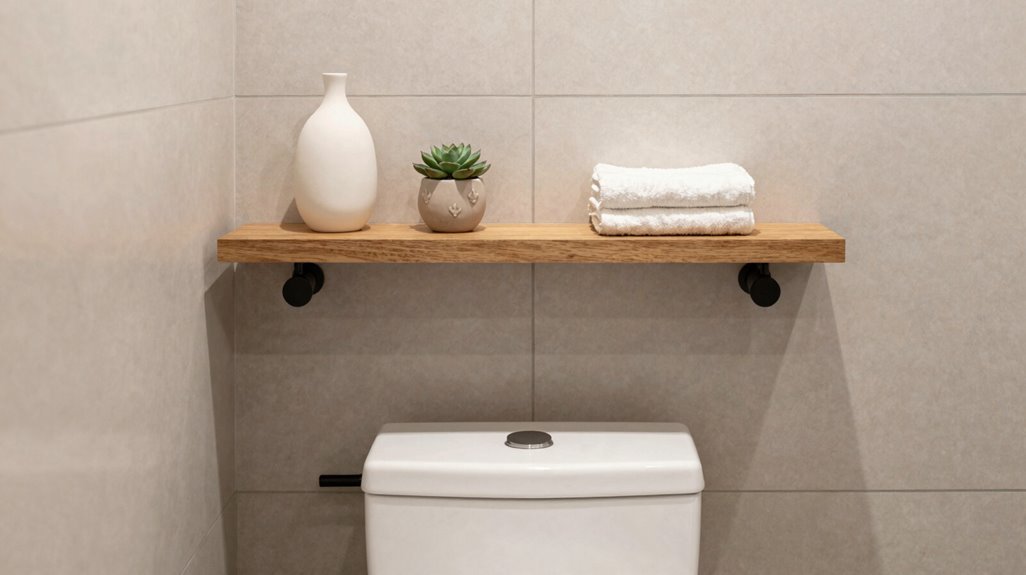
Where else can you reclaim 12 to 18 inches of vertical real estate without sacrificing a single square foot of floor space? You install floating bathroom shelves above the toilet, turning dead wall space into functional storage.
You maximize vertical capacity in compact bathrooms by mounting shelves 24-30 inches above the tank, maintaining 18-inch clearance for tank access. You select moisture-resistant materials, sealed hardwood, powder-coated metal, or marine-grade plywood, to withstand 60-90% humidity levels typical in bathrooms.
You create cohesive sightlines by matching shelf finish to your vanity or mirror frame. You display rolled towels, small plants, and daily toiletries within arm’s reach. You reduce visual clutter through low-profile installation, preserving open floor area.
You protect your investment with proper sealing, helping shelves last 10-15 years in humid conditions. You solve spatial constraints through strategic vertical expansion.
Add a Slim Ladder Shelf for Flexible Storage
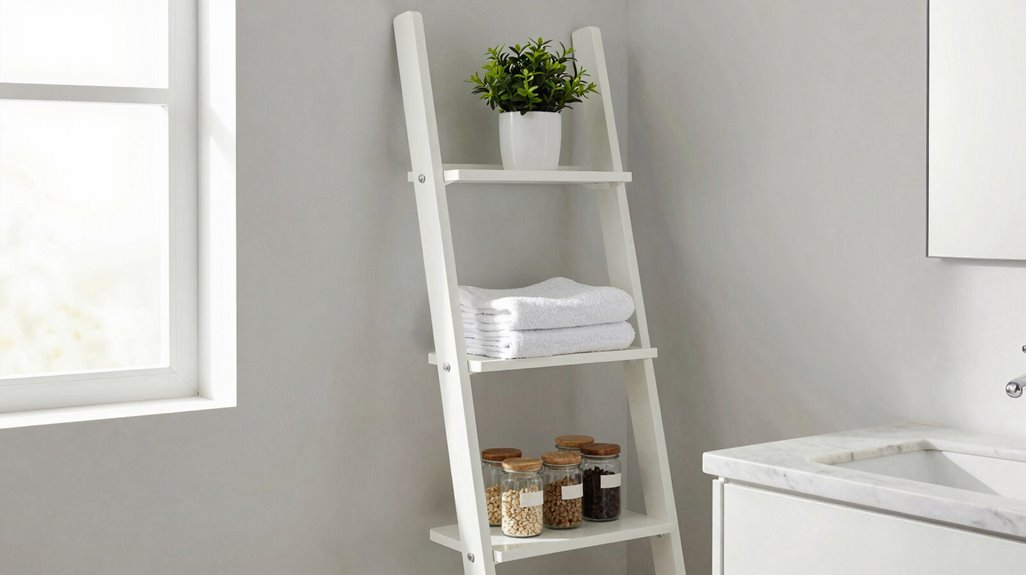
Slide a slim ladder shelf into that awkward 6- to 10-inch gap between your vanity and shower wall, and you reclaim vertical storage without committing to permanent installation. This ladder shelf delivers 3 to 5 tiered rungs, each spanning 12 to 16 inches wide, creating distinct zones for systematic organization.
Slide a slim ladder shelf into that awkward gap and reclaim vertical storage without drilling a single hole.
Assign lower rungs to daily bath products: shampoo, conditioner, body wash, keeping essentials within arm’s reach. Reserve upper levels for folded hand towels, small potted plants, or candles, maintaining visual breathing room. Most units measure 60 to 72 inches tall, drawing eyes upward and expanding perceived ceiling height.
Select water-resistant bamboo, powder-coated steel, or sealed wood composites rated for humid environments. Non-slip rubber feet protect tile, vinyl, or hardwood from scratches while stabilizing the structure. For expanded capacity, clip S-hooks or hang slim baskets from individual rungs without drilling walls.
Your compact bathroom gains functional, adaptable storage that relocates when layouts change.
Stack Wire Baskets for Modular Bathroom Shelving
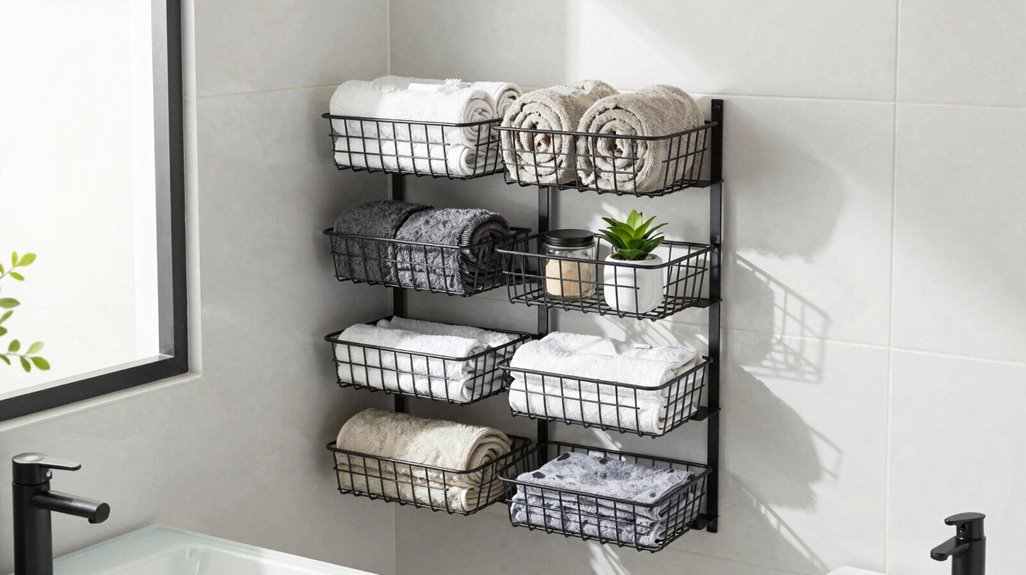
If you’re working with even tighter clearances, wire baskets offer another zero-installation solution with added flexibility. Stack wire baskets create modular, open shelving that maximizes vertical storage without occupying floor space in small bathrooms. The wire design allows visibility and airflow, helping items like colorful towels, toiletries, or washcloths dry more quickly and resist moisture buildup. When it comes to bathroom Shelf Ideas, natural materials and potted plants go hand in hand with this system.
| Feature | Benefit | Best Placement |
|---|---|---|
| Multi-tiered configuration | Leverages compact spaces above toilets | Awkward gaps become functional storage zones |
| Detachable components | Easy cleaning and reconfiguration | Adjust as needs change |
| Non-slip feet | Protects floors, stabilizes units | Various surfaces |
| Wire construction | Quick drying, moisture resistance | Next to custom vanity or marble sink |
You create a classic bathroom design with tones that complement wood shelves and improve your bathroom interior.
Mount a Narrow Bathroom Shelf Over the Sink
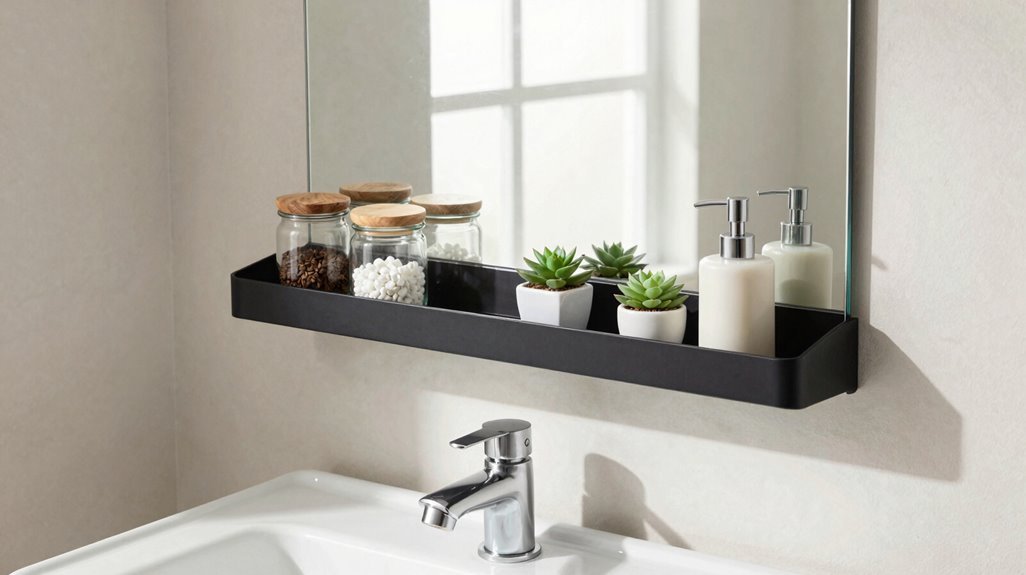
How do you reclaim wasted vertical real estate above a common fixture without sacrificing function? You mount a narrow bathroom shelf over the sink, turning dead wall space into active storage.
This placement preserves your limited floor area while creating a dedicated zone for bathroom shelf decor and daily essentials. You’ll gain 8-12 inches of display depth, sufficient for glass jars, toiletries, and small decorative objects that previously cluttered your countertop.
Select moisture-resistant materials; sealed wood, powder-coated metal, or marine-grade polymer, to withstand humid conditions. Install with wall anchors rated for 15-20 pounds, making sure of level alignment with a laser or bubble tool. Position 6-8 inches above your faucet to prevent splash damage while maintaining easy reach.
Secure brackets every 12 inches, and you’ll create functional, accessible storage without compromising your compact layout.
Add Shelves Behind Your Door for Hidden Storage
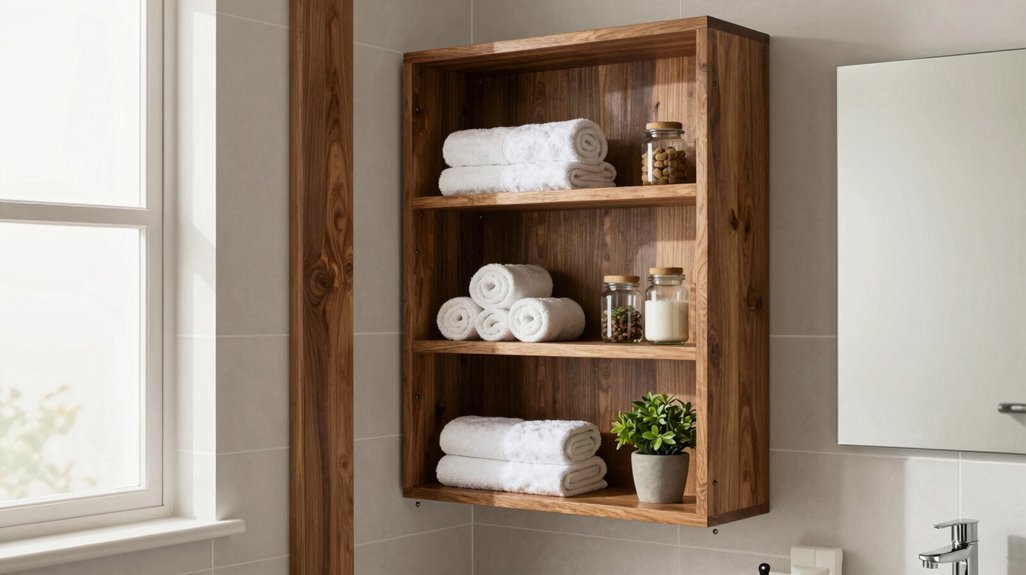
Because conventional storage consumes your limited square footage, you’ll install shelves behind your door to reclaim vertical real estate that remains invisible from the main bathroom space. This bathroom design strategy turns overlooked vertical zones into functional storage without compromising your floor plan.
You’ll select slim, multi-layer shelves, typically 4-layer configurations, maximizing capacity for towels, toiletries, and decor. These units remain portable, install quickly, and withstand humid conditions through water-resistant materials with detachable, washable components.
You’ll protect surfaces using non-slip, scratch-proof foot pads, preventing door and floor damage during daily use. This hidden storage solution fits seamlessly into compact layouts, keeping essentials accessible yet concealed. Your bathroom maintains visual openness while storing necessities efficiently, showing that strategic placement solves spatial constraints without expanding your footprint.
Mount Corner Bathroom Shelves in Tight Angles

You’ll reclaim dead space by mounting corner shelves that exploit vertical real estate, typically 24-36 inches in height, without sacrificing your limited floor footprint. Select angular designs, triangular or pie-shaped units with 90-degree backs, that nest flush into wall junctions, accommodating standard 12-inch or 16-inch stud spacing for secure installation.
Prioritize four-tier configurations with moisture-resistant polymer or sealed wood composites, making certain each shelf supports 15-20 pounds while withstanding humidity levels above 60%.
Maximize Vertical Space
Where exactly does your small bathroom waste the most space? You overlook vertical real estate, leaving walls bare while clutter consumes precious floor area. You mount corner bathroom shelves to reclaim these dead zones, turning tight angles into functional storage without expanding your footprint.
You install multiple tiers in vertical stacks, maximizing cubic storage rather than horizontal spread. Position these units above toilets or in corner nooks where width remains fixed but height offers opportunity. You select slim, four-layer designs with non-slip, scratch-proof feet to protect narrow wall surfaces and flooring simultaneously.
You prioritize moisture-resistant materials: natural wood with metal frames withstands humidity while projecting refined aesthetics. You demand easy installation with detachable, washable components, enabling rapid cleaning and portable reconfiguration as your spatial needs evolve.
Choose Angular Designs
Precision demands you exploit every degree of available space, and corners present your most overlooked opportunity. Corner shelves convert dead angles into functional storage by mounting flush against two walls, eliminating protrusion while preserving precious floor clearance.
Select triangular or angular shelf shapes that seat directly into 90-degree wall junctions above fixtures or within tight alcoves. Install four-tier configurations to multiply vertical capacity without expanding horizontal footprint. Choose materials suited to moisture exposure: sealed wood with metal frames, powder-coated steel, or matte-finish composites resist humidity degradation.
Corner shelves accommodate diverse aesthetics, from natural-toned warmth to refined luxury finishes. Specify wall-mounted or detachable units to enable thorough cleaning behind and beneath surfaces. You reclaim wasted geometry, optimize accessibility, and maintain environmental durability through deliberate angular selection.
Install a Shallow Picture Ledge for Small Walls
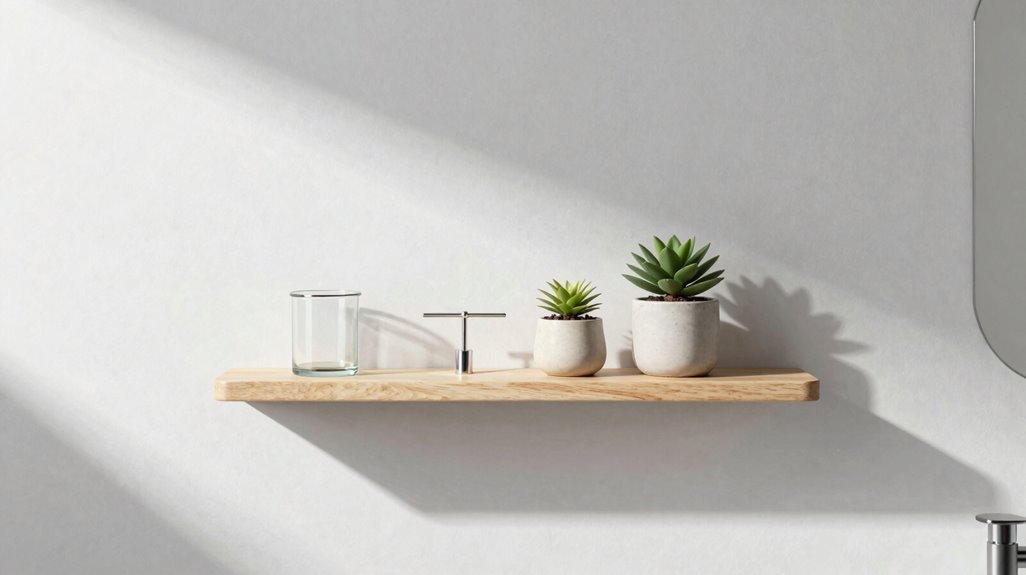
You will gain immediate spatial efficiency by mounting a 3- to 4-inch deep ledge, which protrudes minimally while supporting 5-10 pounds of toiletries or framed prints per linear foot. This installation demands only a level, wall anchors rated for 50 pounds, and 30-45 minutes of your time. It turns narrow wall sections above sinks or adjacent to mirrors into functional display zones.
Select moisture-resistant materials, such as powder-coated aluminum or sealed hardwood, and you will establish a cohesive, low-maintenance system that integrates with existing shelving without crowding your compact bathroom.
Space-Saving Depth Advantage
Why let narrow wall sections go unused when a shallow picture ledge converts them into functional storage? You reclaim vertical wall space, freeing precious floor area while gaining visible storage and display surface.
A shallow ledge measures 2–4 inches deep, keeping small bottles, folded towels, and decorative accents within reach without protruding into your path. You install this low-profile solution along tight wall sections, creating continuous horizontal lines that visually expand cramped quarters.
You minimize bumping risks in tight spaces because the minimal depth keeps objects close to the wall. You still support multiple items in tiered arrangements, maximizing every inch.
Pair your shallow ledge with non-slip, washable components and a 4-layer shelf system. You achieve compact, cohesive, moisture-resistant storage that belongs in your small bathroom.
Decorative Display Flexibility
How do you display personal items without sacrificing your already-limited wall space? You install a shallow picture ledge, 2–4 inches deep, that preserves narrow walls while showcasing decor, photos, or toiletries.
Installation Requirements:
- Select a 2–4 inch ledge depth to prevent protrusion into your space
- Apply soft, non-slip feet or wall-friendly mounting for stability on uneven surfaces
- Pair with washable, detachable components, open baskets, small jars, for moisture-resistant cleaning
Display Configuration:
| Element | Purpose |
|---|---|
| Natural wood tones | Warmth, cohesion |
| Glass bottles | Visual lightness |
| Small green accents | Luxury, life |
You layer these elements for a cohesive, polished look. Store Toilet Paper in a small basket on the ledge’s end, keeping essentials accessible yet styled. This system adapts as your needs shift, offering reorganization without hardware changes.
Easy Installation Process
Mount a shallow picture ledge in under 30 minutes using basic hand tools, two wall anchors, and a spirit level for precise alignment. You’ll secure this thin storage solution directly to studs or wall anchors with minimal drilling, preserving your compact bathroom’s floor space and visual flow.
- Gather your materials: drill, screws, anchors, and level
- Mark stud locations, or insert wall anchors at 16-inch intervals
- Attach the shallow ledge, verifying horizontal alignment
This low-profile installation reduces doorway and mirror contact, eliminating bump risks in narrow layouts. You’ll place lightweight towels, small vases, or toiletries on the smooth surface, adjusting items as needed. Wipe clean with standard cleaners for easy maintenance.
Add a Glass Shelf in the Shower for Wet Storage
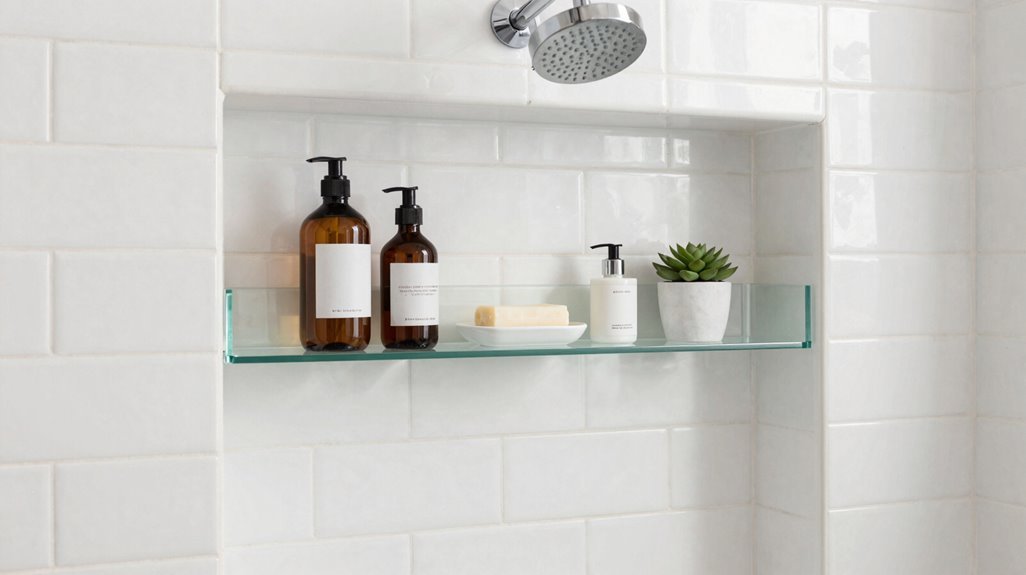
Where can you store shampoo and soap without sacrificing precious square footage? You install a glass shelf in the shower, creating slim, unobtrusive storage that keeps essentials within reach while maintaining a visually open feel in your compact bathroom.
A glass shelf reflects light, brightening damp spaces and helping your shower area feel larger and more airy. Narrow designs maximize display space without crowding, making them ideal for soaps, shampoos, and wash accessories. Floating styles avoid bulk and wall clutter, allowing easy cleaning with minimal installation disruption in tight niches.
When selecting your shelf, prioritize these four specifications:
- Tempered or safety glass construction
- Secure wall anchors rated for wet environments
- Width between 4-6 inches to optimize corner placement
- Weight capacity of 10-15 pounds minimum
You’ll reduce breakage risk, make certain of stable support, and create functional wet storage that integrates seamlessly into your small bathroom’s existing footprint.
Install a Recessed Niche for Tile Surrounds
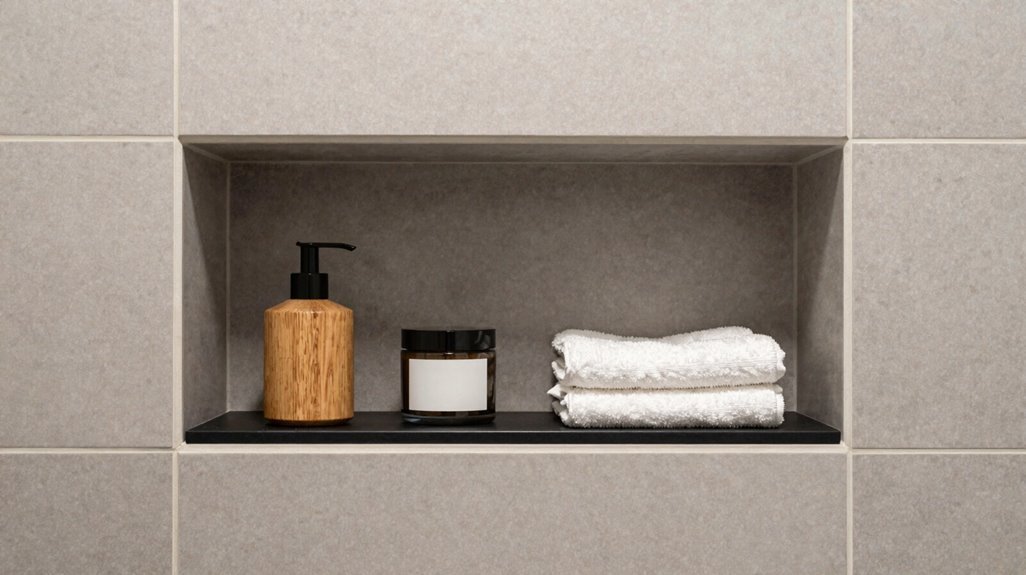
Install a recessed niche within your tile surround to reclaim 3-4 inches of wall depth while creating a dedicated 12-inch-wide storage alcove that eliminates protruding fixtures. You’ll select glass, mosaic, or field tile that matches your surround material, so the niche reads as intentional architecture rather than afterthought retrofit.
Configure your niche at 48-60 inches height for daily items, or extend it floor-to-ceiling for 24-36 inches of vertical capacity. Add perforated backing and optional LED strips to address moisture control and visibility requirements.
Space-Saving Design Solution
How do you reclaim square footage in a bathroom that offers none? You install a recessed niche for tile surrounds, converting hollow wall space into built-in niche storage that never intrudes on your limited floor area.
This solution turns dead wall cavities into functional shelving without protruding units that snag elbows or obstruct traffic flow. You gain organized, accessible storage for daily essentials while maintaining clean sightlines.
Consider these implementation factors:
- Frame the cavity between studs, typically 14.5 inches wide, to maximize standard spacing
- Install cement board backing, then apply waterproof membrane with 6-inch overlaps at seams
- Select moisture-resistant porcelain or ceramic tile rated for wet conditions
- Add 3/8-inch tempered glass shelves, spaced 12 inches vertically, for adjustable configuration
You eliminate countertop clutter, protect items from shower spray, and create seamless integration with your tile surround.
Tile Integration Options
Why settle for shelving that clashes with your walls when you can embed storage directly into the tile field itself? Tile integration turns recessed niches into seamless storage solutions that maintain your bathroom’s cohesive surface.
You’ll maximize vertical storage without sacrificing floor space by installing a niche within your tiled wall. Choose glass-tiled or mint-hued surrounds to create bright, visually expansive effects in compact bathrooms. The continuous tile material prevents shelving from appearing disconnected, turning your niche into an intentional design feature.
Pair narrow glass shelves with your tile integration for display areas that complement surrounding colors and patterns. This approach delivers floor-to-ceiling impact while preserving open area, keeping essentials within reach without disrupting your bathroom’s unified aesthetic.
Storage Versatility Benefits
Where exactly should you store daily necessities when floor area measures under 30 square feet? You install a recessed niche for tile surrounds, creating built-in storage that consumes zero floor space while maximizing vertical potential within wall cavities.
A recessed niche integrates seamlessly with surrounding tile, housing towels, toiletries, or decor without protruding into limited square footage. You customize this solution with distinctive tile patterns; green zellige, mint-hued ceramics; to establish focal points while expanding capacity.
Consider these structural advantages:
- You reclaim 6-12 inches of depth from standard wall construction
- You install moisture-resistant shelving at accessible heights
- You maintain washable, hygienic surfaces in humid conditions
- You support multi-layer configurations for categorical organization
This approach reduces visual clutter, preserves traffic flow, and delivers permanent, integrated storage that belongs precisely where you need it.
Build Floor-to-Ceiling Shelving for Full Walls
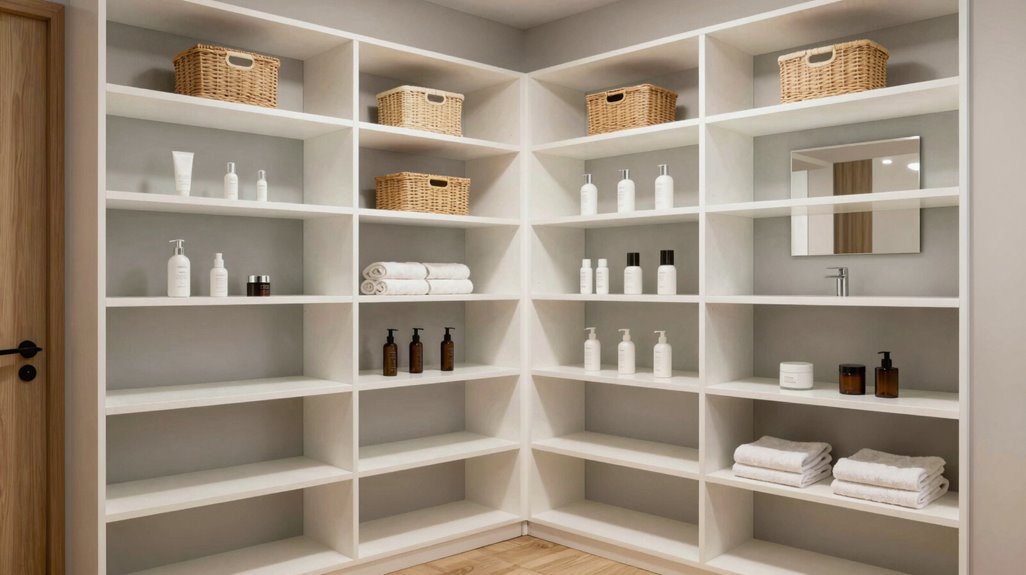
Max out your vertical real estate by building floor-to-ceiling shelving across full wall surfaces, a strategy that turns dead height into functional storage without expanding your footprint. You’ll gain serious shelf storage capacity for towels, lotions, and daily essentials while eliminating floor clutter entirely.
Pair your tall units boldly with custom shower doors or architectural niches to create visual contrast and draw the eye upward, amplifying perceived ceiling height. Select black hardware or contrasting finishes to accentuate vertical lines and frame structural details with precision.
Before installation, check load-bearing wall capacity and secure mounting hardware rated for 50+ pounds per bracket, keeping safety in mind in tight quarters. This systematic approach delivers high-design impact with measurable organizational returns.





